
Return air ducts are essential for maintaining a comfortable and healthy indoor environment. They help to circulate air throughout your home, removing stale air and replacing it with fresh air. If your home doesn’t have a return air duct in a particular room, or if your existing duct is damaged, you can easily install a new one yourself.
Installing a return air duct in a wall is a relatively straightforward project, even for DIYers with basic skills. However, it’s important to follow the instructions carefully to ensure that the duct is installed properly and doesn’t compromise the integrity of your wall.
In this blog post, we’ll provide a step-by-step guide on how to install a return air duct in a wall. We’ll also discuss the tools and materials you’ll need, as well as some important safety tips.
What Are Return Air Ducts? Importance of return air ducts in HVAC systems
Return air ducts are typically located in central locations in the home, such as hallways or closets. They are usually covered by a register grill, which allows air to flow into the duct while preventing dust and debris from falling in.
Return air ducts are an essential part of any HVAC system. They are responsible for bringing air back to the central heating and cooling unit so that it can be reheated or cooled and redistributed throughout the home. Without return air ducts, your HVAC system would not be able to function properly.
Air Circulation
Return air ducts are responsible for recirculating air from within the building back into the HVAC system. This circulation helps maintain a balanced airflow, ensuring that air is evenly distributed throughout different rooms. Proper air circulation results in consistent temperature and comfort levels.
Improved Indoor Air Quality
Return air ducts help in removing stale, polluted, and indoor air from living spaces. This air is then filtered and purified before being re-circulated. This process helps remove contaminants, such as dust, allergens, and odors, leading to better indoor air quality.
Energy Efficiency
Return air ducts contribute to the energy efficiency of an HVAC system. By recycling and conditioning the existing indoor air, less energy is required to heat or cool the air, which can lead to reduced energy consumption and lower utility bills.
Temperature Control
Return air ducts play a key role in maintaining consistent indoor temperatures. They allow the HVAC system to monitor the air temperature in different parts of the building, adjust heating or cooling as needed, and ensure that the desired temperature is achieved throughout the space.
Balancing Pressure
Return air ducts help maintain balanced air pressure within a building. When air is extracted from rooms, it prevents the creation of negative air pressure, which can result in doors being difficult to open, drafts, and other discomforts. Properly balanced air pressure ensures a comfortable and safe indoor environment.
Humidity Control
In addition to temperature control, return air ducts also help regulate indoor humidity levels. By returning air to the HVAC system, it can be dehumidified or humidified as necessary, ensuring that the indoor humidity remains at a comfortable and healthy level.
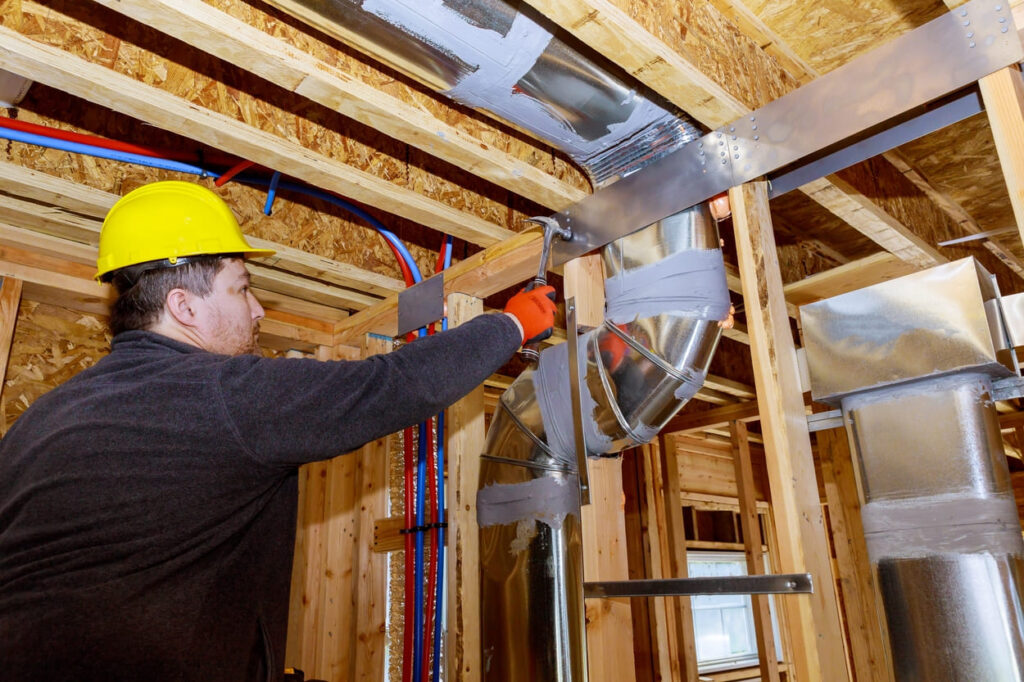
How to install return air duct in wall? Step By Step Guide
Installing a return air duct in a wall is a relatively simple project that can be completed by a DIYer with basic carpentry skills. However, it is important to follow the instructions carefully to ensure that the duct is installed properly and does not compromise the integrity of your wall.
Tools and Materials
1. Return air duct
2. Register grill
3. Sheet metal screws
4. Insulation
5. Caulk
6. Saw
7. Drill
8. Screwdriver
9. Level
10. Measuring tape
11. Safety glasses
1. Choose a Location for the Return Air Duct
The selection of the ideal location for your return air duct is a crucial first step. Opt for a central wall within the room, as this placement helps the duct draw air evenly from all areas. Ensure it is away from doors and windows to avoid interference with airflow.
Equally important is keeping the duct clear of heat sources, such as radiators and fireplaces, which could affect temperature readings and the efficiency of your HVAC system.
2. Mark the Location of the Duct on the Wall
To mark the location accurately, use a level to ensure the duct will be installed straight. Once level, gently mark the desired position on the wall with a pencil. This step is essential for maintaining a neat and symmetrical installation.
3. Cut a Hole in the Wall at the Marked Location
The next step involves cutting a hole in the wall. This hole should be slightly larger than the return air duct to allow space for insulation. You can use various tools for this task, such as a reciprocating saw, jigsaw or a drill with a hole saw attachment.
Take your time and exercise caution, especially if there are electrical wires or plumbing behind the wall. Safety goggles and protective gear are essential during this step.
4. Insulate the Hole in the Wall
To prevent heat loss and air leaks through the hole you’ve just created, insulate it. This is important for energy efficiency. You can use either fiberglass or foam insulation. Ensure that the insulation material fits snugly and covers the entire interior of the hole.
5. Insert the Return Air Duct into the Hole in the Wall
Carefully insert the return air duct into the hole you’ve prepared in the wall. Make sure it is centered properly. Once positioned, secure the duct in place using sheet metal screws. These screws will hold the duct firmly within the wall, preventing any unwanted movement or shifting.
6. Attach the Register Grill to the Front of the Return Air Duct
The register grill is the visible and functional part of the return air duct that allows air to flow into the duct and circulate throughout the HVAC system. It’s crucial to choose a register grill that matches the size of the duct’s opening. Align the grill with the duct opening and attach it securely.
7. Caulk Around the Perimeter of the Register Grill to Seal Any Air Leaks
To ensure there are no air leaks around the register grill, use caulk, which is a sealant designed to seal gaps and cracks. Apply a bead of caulk around the entire perimeter where the register grill meets the wall. This creates an airtight seal, preventing conditioned air from escaping into the wall cavity and maintaining the overall efficiency of your HVAC system.
Additional Tips to Follow When Installing a Return Air Duct in a Wall
- Make sure the duct is the right size: The return air duct should be sized to match the capacity of your HVAC system. If the duct is too small, it will not be able to handle the airflow, and your system will not be able to operate efficiently. If the duct is too large, it will create unnecessary noise and vibration.
- Use the right materials: Return air ducts are typically made of sheet metal or fiberglass. Sheet metal ducts are more durable, but they can also be more expensive and difficult to install. Fiberglass ducts are less expensive and easier to install, but they are also less durable and more likely to leak.
- Insulate the duct: Insulating the return air duct will help to prevent heat loss and air leaks. You can use fiberglass insulation or foam insulation.
- Seal all joints and connections: It is important to seal all joints and connections in the return air duct to prevent air leaks. You can use caulk or sealant to seal the joints and connections.
- Check for electrical wires and plumbing pipes: Before you cut a hole in the wall for the return air duct, it is important to check for electrical wires and plumbing pipes. You can use a stud finder to locate any wires or pipes that may be in the way.
- Test the duct: Once the duct is installed, it is important to test it to make sure that it is working properly. You can do this by turning on your HVAC system and checking to see if air is flowing through the duct.
Don’t Forget to Clean Your Air Ducts
After successfully installing a return air duct in your wall, it’s important to remember that maintenance doesn’t stop at installation. To ensure your HVAC system operates efficiently and that the indoor air quality remains high, regular cleaning of your air ducts is essential.
Over time, dust, debris, allergens, and even mold can accumulate inside your ductwork. This buildup can restrict airflow, reduce the system’s efficiency, and negatively impact indoor air quality.
If you’re located in Virginia, Maryland, or Washington, and you’re looking for reliable and professional air duct cleaning services, consider reaching out to Purifox LLC. Purifox is a trusted name in the industry, known for their expertise in air duct cleaning.
Final Words
Congratulations, you’ve reached the end of our guide on how to install a return air duct in a wall. By now, you should have a solid understanding of the importance of return air ducts in HVAC systems, the tools and materials you’ll need, the step-by-step process of installation, and the significance of keeping your air ducts clean.
Installing a return air duct can bring about significant improvements in indoor air quality, temperature control, and energy efficiency in your home or building.
Thank you for taking the time to explore the world of return air duct installation with us. We hope this guide has been informative and valuable in your journey to enhance your HVAC system and indoor living space.
If you have any questions or need further assistance, feel free to reach out to us. Your comfort and satisfaction are our top priorities.
FAQs
Is it possible to install a return air duct in an existing wall?
Yes, it’s possible to retrofit a return air duct into an existing wall, although it might be more challenging than installing in new construction. A professional’s assistance is often advisable for this.
Do I need to insulate the return air duct in the wall?
Insulating the return air duct is highly recommended. It helps prevent heat loss or gain in the duct and minimizes condensation, ensuring your HVAC system operates efficiently.
How often should I clean my return air duct?
Regular air duct cleaning is essential for maintaining indoor air quality and HVAC system efficiency. A general guideline is to have them cleaned every 3-5 years, but factors like location and use might require more frequent cleaning.
How can I tell if my return air duct is functioning properly after installation?
Signs of a well-functioning return air duct include consistent indoor temperatures, improved air quality, and efficient HVAC system operation. If you notice issues like poor airflow or uneven heating and cooling, it’s best to consult a professional for an evaluation.
What is the best way to cut a hole in the wall for the return air duct?
The best way to cut a hole in the wall for the return air duct is to use a drywall saw. Drywall saws are specifically designed to cut through drywall without damaging the surrounding area.
Are there different types of return air ducts available for installation?
Yes, there are various types of return air ducts, including traditional ductwork, flexible ducts, and more. The choice depends on your specific HVAC system and installation requirements.
